In macOS Big Sur, Time Machine added support for backups onto APFS-formatted volumes (the filesystem that Apple introduced a few releases ago). But Apple omitted a big footnote that should be in its documentation: An APFS-formatted volume can’t be used for networked Time Machine backups.
Time Machine can work by backing up to a drive attached directly to a Mac. But if you have a desktop machine to which you can easily attached a fixed, high-capacity drive, you can make that drive a Time Machine destination for other Macs on the network. If you format that disk only with APFS partitions, you will try to follow the steps to use it from a network-connected Mac, and receive the following complicated warning:
You do not have the necessary read, write and append privileges on the selected network backup disk.
Apple doesn’t document this error on its support site, which is a pity. While it can mean many things, in the context of Time Machine, it typically means that you are trying to back up to a Time Machine volume on an APFS-formatted partition. Instead, you seemingly can only backup over the network to an old-school Mac OS Extended (Journaled), known more familiarly as HFS+.
Because Disk Utility can adjust partition sizes non-destructively after they are created, you don’t need to erase your Time Machine drive, but can add an HFS+ partition. Here’s how to adjust your drive:
- Open Disk Utility.
- Select the drive in sidebar. (If you don’t see the drives, only volumes, choose _View > Show All Devices.)
- Click the Partition button.
- Disk Utility prompts to ask if you want to add a volume to an APFS container (preferred for managing APFS-formatted partitions) or divided the storage. Click Add Partition.
- Click the +.
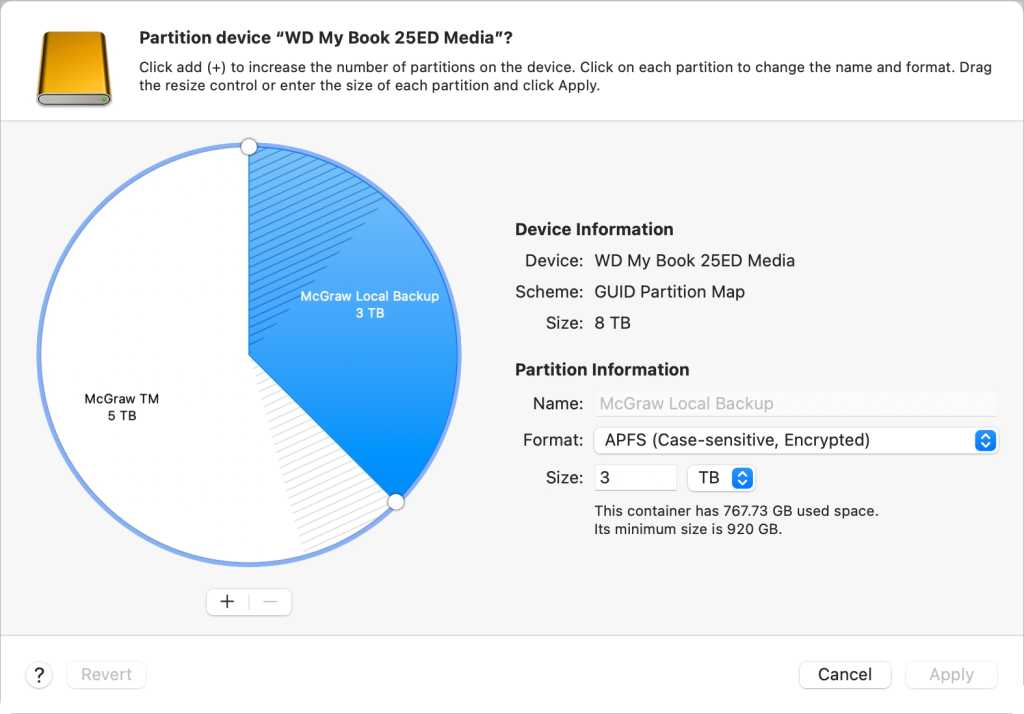
- Name the partition, select Mac OS Extended (Journaled), and choose a size. I recommend estimating the depth of backups you will want for the local machine and the rest of the machines on the network. I think doubling the volumes you’re backing up is a good estimate: a drive with 1TB of data could have a 2TB or even larger backup volume to retain a significant long-term set of older versions of files in addition to the current freshest backup state.
- Click Apply.
- Wait for completion, and the then click Done and the new partition’s volume has mounted.
 https://www.macworld.com/wp-content/uploads/2021/04/disk-utility-partition-change.jpg?resize=300,209 300w, https://www.macworld.com/wp-content/uploads/2021/04/disk-utility-partition-change.jpg?resize=768,536 768w, https://www.macworld.com/wp-content/uploads/2021/04/disk-utility-partition-change.jpg?resize=1024,715 1024w, https://www.macworld.com/wp-content/uploads/2021/04/disk-utility-partition-change.jpg?resize=1536,1072 1536w" sizes="(max-width: 1575px) 100vw, 1575px" />
IDG
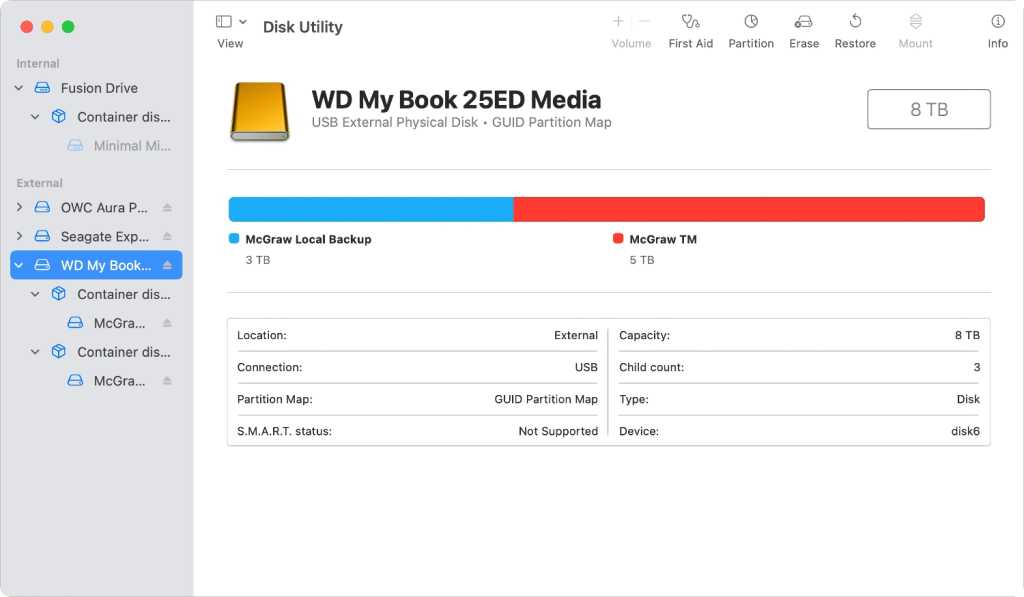
Now you have two volumes. In my case, I called them “McGraw Local Backup” for the APFS partition’s volume that I was using for local backups from the Mac to which the drive is attached, and “McGraw TM” for networked-based backups to the HFS+ partition’s volume. (You can name you volumes whatever makes sense to you.)
 https://www.macworld.com/wp-content/uploads/2021/04/time-machine-partitions-backup.jpg?resize=300,175 300w, https://www.macworld.com/wp-content/uploads/2021/04/time-machine-partitions-backup.jpg?resize=768,448 768w, https://www.macworld.com/wp-content/uploads/2021/04/time-machine-partitions-backup.jpg?resize=1024,597 1024w" sizes="(max-width: 1500px) 100vw, 1500px" />
With two partitions, you can set each to a separate filesystem type to work within Time Machine’s limitations
IDG
You can now prepare the HFS+ volume for use with Time Machine:
- Open the Sharing preference pane.
- Select the File Sharing service in the left-hand pane.
- If the HFS+ volume isn’t in the Shared Volumes list, click the + sign below that list and choose that volume.
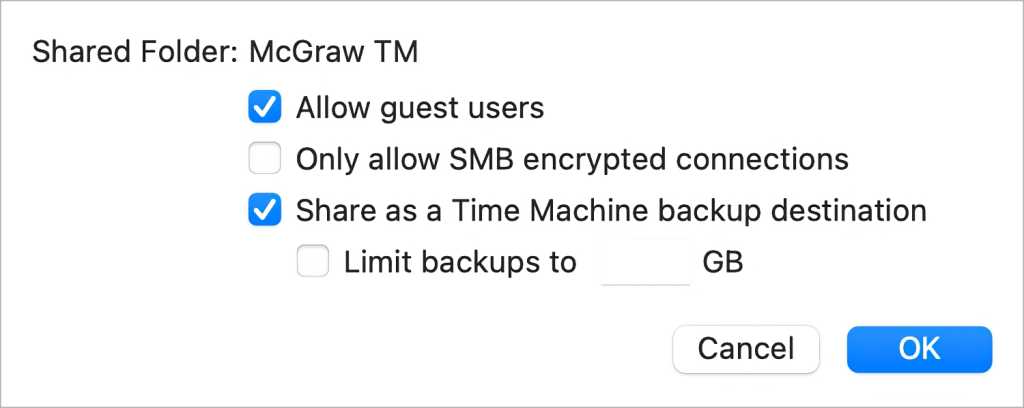
- Control click the volume’s name in the list, select Advanced Options, and check the “Share as a Time Machine backup destination” box. You can also check Allow Guest Users and check and set a limit for Time Machine backups. Click OK.
- In the Users list, select Read & Write from the Everyone pop-up menu.
 https://www.macworld.com/wp-content/uploads/2021/04/time-machine-sharing-advanced.jpg?resize=300,120 300w, https://www.macworld.com/wp-content/uploads/2021/04/time-machine-sharing-advanced.jpg?resize=768,307 768w, https://www.macworld.com/wp-content/uploads/2021/04/time-machine-sharing-advanced.jpg?resize=1024,409 1024w" sizes="(max-width: 1500px) 100vw, 1500px" />
Use the Sharing pane to set a volume as a destination for Time Machine.
IDG
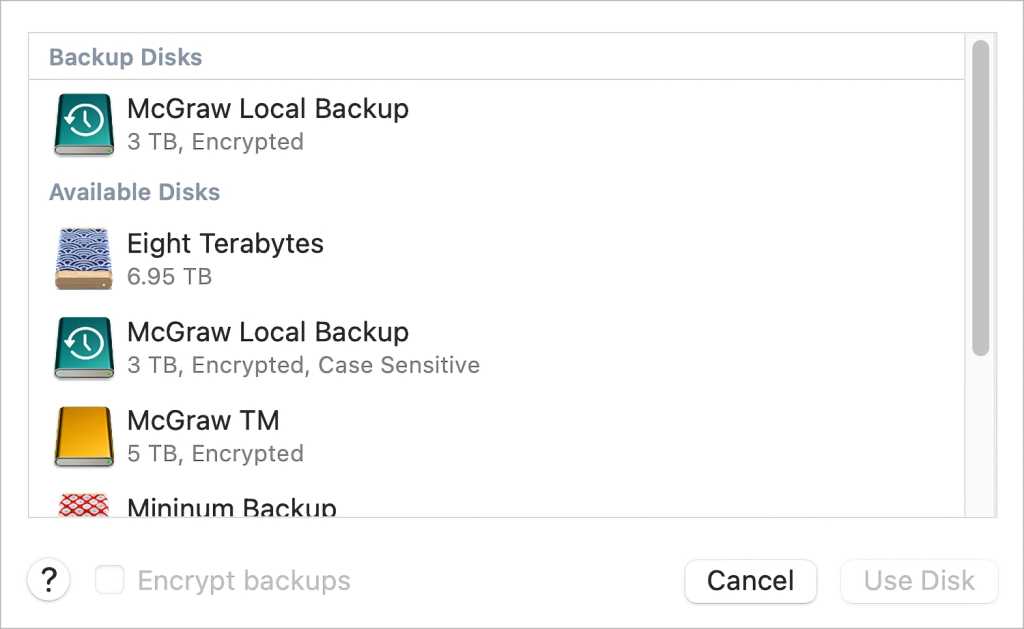
You can now proceed to other machines on the network, and the HFS+ volume will appear as an option when you open the Time Machine preference pane and click Select Disk. Once selected, you may be prompted to confirm the connection, and to enter a user name and password.
 https://www.macworld.com/wp-content/uploads/2021/04/time-machine-network-drive-select.jpg?resize=300,184 300w, https://www.macworld.com/wp-content/uploads/2021/04/time-machine-network-drive-select.jpg?resize=768,472 768w, https://www.macworld.com/wp-content/uploads/2021/04/time-machine-network-drive-select.jpg?resize=1024,629 1024w" sizes="(max-width: 1500px) 100vw, 1500px" />
The networked Time Machine volume appears as a destination.
IDG
You should be able to connect as Guest and use it that way because you set up access for Everyone to read and write files to the volume. However, in testing, I found I needed to use my user name and password to create the network connection, even though the Time Machine volume wasn’t mounted in the Finder of other family member’s Macs.
Time Machine backups will now proceed as expected.
Encryption coda
Now, just to add to the confusion: after working through the above difficulties with a new drive intended for Time Machine, and getting all the pieces to work correctly together, I decided to encrypt each of the two Time Machine volumes.
In Mojave or later, encrypting an external volume converts it from HFS+ to APFS (Encrypted). This seemed to work for a bit with the Macs that previously generated an error connected to APFS. However, it quickly became erratic. So, while I didn’t receive the error noted at the start of this article again, I was unable to make reliable backups.
I had to revert. In Disk Utility, I selected the partition and changed it back to Mac OS Extended (Journaled), erased the existing backups, and was back in business. The Sharing preference pane appeared to keep the setting for the partition to act as a Time Machine volume.
Instead of using volume encryption, I opted for Time Machine backup encryption. When you select a volume in the Time Machine preference, you can check the Encrypted Backups option, and then enter a password. Again, try to generate and store it in a way that you can always have it available.
Since I’m storing nothing else on that volume, even if it were obtained by someone else, they would also need the individual backup passwords for each device using the volume as a Time Machine destination to access the data on them.
Ask Mac 911
We’ve compiled a list of the questions we get asked most frequently along with answers and links to columns: read our super FAQ to see if your question is covered. If not, we’re always looking for new problems to solve! Email yours to mac911@macworld.com including screen captures as appropriate, and whether you want your full name used. Not every question will be answered, we don’t reply to email, and we cannot provide direct troubleshooting advice.


